Monday, October 22, 2012

Order of 'The Shallows' Sections!

★ ★ ★ 

Salutations Digital Media I,

Here is the order of those who will be going in partition to the Nicolas Carr internet reading.

I think a good thing to keep in mind with this list is a good interpretation of the work you have seen thus far of the colleagues around you. This is in addition to of course remaining true to your own vision and strengths. What are their own aesthetic cues that they work in? What makes them tick? Take a large part of yourself in visualizing your paragraph in addition to also understanding the paragraphs and potential visuals around you. What is unique about this assignment is that it is not totally embedded in one's own artistic practice. It is 'all' found footage so it all literally existing in the socially networked parameter of this world. We all get along!

Any questions : You know not to hesitate to ask.

1. Erin McMahon
2. Emma
3. Serena
4. Shay
5. Erin Meyering
6. Brian
7. Elizabeth
8. Jenie
9. Kaitlin
10. Elo
11. Katie
12. Lena
13. Stormy
14. Elissa
15. Priscilla
16. Carl
17. Chohnny


★ ★ ★ 


Wafaa Bilal. Project "3rdi".

★ ★ ★ 


Good luck.


★ ★ ★ 

Sunday, October 21, 2012

Project 5, "Crossover : Reading + Found Footage"

★ ★ ★ 

DUE : Throughout dates
spanning three weeks.


Nov 5  : EDITED ASSIGNMENT

The SECOND ROUGH EDIT of your assignment.
You will build from your edit from the previous week of this
turn in. VISUALLY (VIDEO WISE), the piece should be complete.
AUDIO WISE, only include SOUND EFFECTS in your piece.
We will place the videos together in a single reel on Final Cut
Pro and watch it all together as a group. We shall decide then
a correlating audio throughout the short film, what is working
in transition with one another's cut, what is not working, and more.
The short film will effectively be finalized altogether in class
next week. By the end of the day, it will be uploaded and online.

★ ★ ★ 

WORKSHOP TIMES : 
With myself.
Thursday, Nov 1. 1-4.
Sunday, Nov 4. 1-4.

★ ★ ★ 

A S S I G N M E N T   5

"Crossover : Reading + Found Footage"

a.k.a.  a collaborative short film using existing
internet footage to make a visual representation of
Nicolas Carr's "The Shallows : What the
Internet is Doing to Our Brains"

inspiration : https://vimeo.com/groups/foundfootage

★ ★ ★ 


★ ★ ★ 


http://archive.org/ (Thousands of existing free-to-edit video. Old time footage!)
http://keepvid.com/ (For taking footage off of a Youtube video.)
Plus plenty more aggregates that exist in finding "found footage".

We are about to embark on an experimental assignment not attempted before. One which combines aesthetic-technical ability with academic study.

Yes, you are reading right. You are not to shoot any of your own footage for this assignment. This may come as a relief for some of you possibly. BUT, we are to attack one of the most technical of all aspects when it comes to creating your own video : editing. Essentially, for those any and all familiar with the language of cinema, everything ends on the editing floor. What may have been a Godfather could become a Curious Case of Benjamin Button (I apologize in advance for that).

You will be locating any and all video footage you can put your hands on for this assignment in conjunction with a section/paragraph of your choosing (which will be finalized in class Oct. 22) of the reading. There are 17 divisions total and 17 members of our course. Here are the bulletpoints of the assignment below-

★ ★ ★ 

★ Have in your possession by the end of class your paragraph/section of the reading.
Your assignment is to be exactly, with no intro or outro credits, 30 SECONDS.
Edit a visual representation to your paragraph/section using found internet video footage!
A minimum of 7 cuts and/or transitions must be utilized in the 30 seconds.
Somewhere in the 30 seconds, audio representation somehow of a 'computer'.
Somewhere in the 30 seconds, video representation somehow of a 'reflection'.
If your paragraph references a specific time-place-person-etc... You shall do so as well.
All edits must be Standard Definition (4:3 Ratio; Exported 720x480) (edit upon export).
All edits will run at 24 FPS (standard cinematic frame rate) (edit this setting upon export).
You are to consult the person going before and after you on a proper transition between!
And a few kinks which we will go over as time rolls along surely.

Once more, this is an experiment designed to not only emphasize the technical aspects of this course's study but the theory behind what we are all doing.

SOME things we might consider in the end-
Potentially having a musical score become the background of the whole edit.
Having a graphic intro/outro-credits emulate the cover design of the book itself.
Shipping this virally to the author himself who is Nicolas Carr. He might be thrilled.
Shipping this to (maybe discussed) a student film festival of choosing this/next semester.
And more.

This assignment alleviates more for the brain cells, naturally, as the length is decisively 30 seconds.. no more, no less. It may also be deceptively simple. In much lesser parameters, I expect a myriad of editing skills you will learn in between now and conclusion. I shall reiterate that all cinema/video ends on the editing room floor. This is a project that will literally begin and end on the editing room floor.

Good luck.


★ ★ ★ 

Saturday, October 13, 2012

Part 2, Burning a DVD of Your Video

Back again. By late-Sunday, you should be finalizing your projects for the home stretch. Understandable that shooting and editing video is no laughing matter beginner or advanced, the fun part (and this goes for most art) is installing the piece in its proper format. In our case, we will burn DVDs so each of your two emulations/reenactments are playable on it! It is straightforward and I will walk you through it below. For practitioners of digital art or aspirers, this is crucial knowledge I believe to know how to do this. If you have a clue or bluntly just know how then more power to you! For those who want to know follow along.

WHAT YOU NEED BEFORE HAND : A DVD of course. They're everywhere. Walgreens. Best Buy. Wal-Mart. Target. No missing them. They come cheap too for sleeves of 5. DVD-R is recommended, though +R is okay too. DVD-R is write once format, which in the end is better.


On we go. The top finder menu contains in the MOVIES
folder of the user two examples we will be burning. It
is necessary for the files to be in there and you'll see why.
The finder window below is iDVD in the applications
folder. Double click iDVD to continue-


Create a new project!


You have typical options such as file name and
where to save it. Here's a thing to notice and
remember of your videos : Were they widescreen
or standard ratio? What will work best for me?
Select the proper one and CREATE-


What you'll see upon entering. We'll be putting
on media very soon. Lets double click "revolution
main" to change the title...


Peripheral things to alter, aside from the title which
is fairly important. We've changed it to "Jane Doe".


In the bottom right, you will have noticed three
options... THEMES, BUTTONS, and MEDIA.
Go from THEMES (current) to MEDIA. Now
you'll realize why we needed to put the videos
in the MOVIES folder. Click on that folder within
the iDVD interface to locate its contents. Drag in...


Now they are playable!
In fact, click on the play
button to preview the DVD.


It will look as it is in a player.


Clicking on DVDDemo_1...


Clicking on DVDDemo_2...


Up to you to decorate it, though I will not
count off for particularly uninspired designs
this time around. That one is just on your
own mental anguish if it is tacky.


Simply go here to take note of the
flow your DVD runs at. Make
sure there are no warning signs of
the sort. Now click on the BURN...


It will give you this prompt. Insert the DVD.


Now the waiting game...


Congratulations. Don't forget to also
upload to Youtube and post on the blog!


Good luck.


Wednesday, October 3, 2012

Part 1, Approaching "Video"

Hello ART 245,

Do not consider the below as a final word on the method to accomplishing this assignment, but as a solid guide towards achieving your goal! It is very image based to help clarify what needs to be done. Do keep in mind however that it is ultimately on you come into workshops, take notes during class (when you 'are' in class, ahem), and do exploring on your own for the most specific visionary details you predict happening that only you could understand.

Now to begin-

The issue of actually RECORDING VIDEO!

UNR Art Department Media Check-out!
[E-mail me or Dillion, lab tech, when his email is available. Me for now.]
We have plenty of cameras, tripods, and peripheral equipment ready for checkout! First come first serve basis. Same as the knowledge center. You may be filling out a short check-out form (standard protocol) to acquire them and then you're off.

UNR Knowledge Center A/V Equipment Checkout
Check out the multimedia area of the UNR Knowledge Center F1/basement (back of the big @One lab) to check out what they have! Use this link and additional tabs for more stuff (such as audio equipment for checkout) to pinpoint what you want. Some items may require on the spot training but its something you gotta deal with. Call ahead of time to make sure it is in stock! And of course, don't bring it in late! They don't like that.

Yourself!
You must have your own device that may be used for disposal for this assignment and the next. Look around. If you feel the need to obtain your own through borrowing or purchase, that's your decision.

Now a brief run through of common methods.

SHOOTING video varies from device to device, though each on its own is very intuitive to harness control of in that aspect. A MAJORITY OF OCT 8 CLASS WILL BE UTILIZED TOWARDS SOLIDIFYING ANYONE'S QUESTIONS ABOUT THE EQUIPMENT THEY HAVE AND/OR CHECKED OUT. This will be a crucial class if you feel overwhelmed by video and need me and/or Dillon's assistance in figuring it out hands on.

Capturing media also very much varies, but we can begin here visually are it relates to editing the video. I have done two very quick graphics to explain. CLICK TO ENLARGE.


The manner of recording on each device varies
from data on the actual device drive, a memory
card, a cassette, or otherwise. Important to know
what you're dealing with there. Often a breeze.


.Find this application if you're importing most
material. Oftentimes you'll have to (per image
caption) with a video camera go through LOG
AND TRANSFER/CAPTURE from the FILE
menu on Final Cut Pro to get off card/cassette.
For a typical iDevice or [video] SLR camera- this.

 
 You'll typically find a screen like this. Select
your device and select the .MOV (or movie file)
you want to import from your device into a
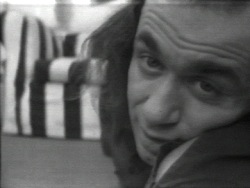
certain folder. In this image, I am importing
that video we shot in class of myself impersonating
Vito Acconci from my iPhone 4S onto the Desktop.


Viola. A brand new video file. Get
ready to import it into Final Cut Pro for use.
More if you have multiple shots.


A master runthrough of the FCP interface.
Beyond this explanation, it should be easier
to intuitively figure out the tools involved.


Start off by importing that video file into FCP!
FILE -> Import -> Files. Sometimes FOLDER
if you have just a ton of files. For now FILES.


We're in the system now. Our file is
in the BROWSER. It can be dragged
down onto the timeline for editing.


Drag and drop. That simple. Top bars above the
equator line are VIDEO and the bottom is VIDEO.
Note how we're looking at Vito/me on the viewer
and canvas. I have the file selected from the browser
and am viewing that on the viewer. However, the
video is on the timeline and the scrubber is over
a part of it so we are viewing it. The reason the base
file is upside down is because I may have shot it
upside down. I fixed it through a tool called "rotate"
within the viewer menu. If you shoot properly like
I didn't, that shouldn't be necessary to do.


What you'll do now (and everytime there
is RED on the video or audio) is SEQUENCE ->
Render Selection -> Both. This is so you
can play video back and actually see what
you are doing.


One problem though : Our video may look nothing
like Vito Acconci effect wise, even though I'm
slouched down and slurring at the camera like him.
Lets browse EFFECTS. It is up to you ultimately
to decipher which of the effects that will benefit you.
Once you have added an effect, it can be modified
through the viewer on its own tab.


This one's a freebee. Look at the image to find
out where Desaturate is. Some of you may be utilizing
this as lots of the UBU videos are black and white.
The reason why both the viewer and canvas are B&W
is that I have double clicked on the video WHILE it is
on the timeline, so now the 'viewer' is looking at that
instead of the video file from the browser (the raw file).


Now its a process of adding more effects. Look
at the viewer side and see how you can modify
effects. It's literally like Photoshop, just as a
video editing exercise. Again, decipher what
effects you'll need for your OWN videos.


Lets look at little more closely at the TOOLBAR.
Say I wanna hack off that unrendered end of my
video because I started too late, rushed the project,
and generally don't care. Look below...


1. Select the blade tool.
Cut on the timeline to
divide video and/or audio!
Tip : Align scrubber to where
you wanna cut for a fine cut.

2. Select move tool again.
Just to see its separate.

3. Have cut off end selected and
then DELETE or COMMAND+X
to get rid of it. Now its gone!


If you're interested in special transitions
between clips and at the ends of clips,
use this! For instance, you can find "CROSS
DISSOLVE" and fade into/from black.


KEYS : I and O are key. When ready to export video,
hit I when scrubber is at beginning of your video to
have an "IN" point. O likewise at the end, as an "OUT" point.
Make sure you're on the timeline when you do this.


FILE -> EXPORT ->
Using Quicktime Conversion


You should get an interface like this.
Don't SAVE (export) quite yet. You need
to go to OPTIONS besides QT Movie.


You'll get to this now. The next three images
will be selecting these in THIS order-
Video : Settings.
Video : Size.
Audio : Settings.


The only things you should change on this
is scrub Quality to BEST.


Video : Size. It varies. We clearly have standard ratio
[4:3] here so export on the left dimensions. If you
have a high quality widescreen, export w/ right settings.


Audio : Best. NOW GO BACK TO
THE FILE SAVE SCREEN AND "SAVE".
That means export. It will export your video!
This may/may not take some time. Depending
on your length.


Congratulations. You have a new video file.


TUTORIAL to be continued with burning
a DVD [e-asy] with your video file later.

Monday, October 1, 2012

Project 4, "Art Video Emulation"

★ ★ ★ 

DUE at two dates-
October 8th (In-Class) &
October 15th (Special Location)
Two separate portions of
the assignment below...

★ ★ ★ 

WORKSHOP TIMES
featuring the Digital Media
dept. new lab tech Dillon!
[Until specified otherwise.]
Thursday, Oct 4 : 1-4 PM

(More for following week will be posted.)


★ ★ ★ 

A S S I G N M E N T  4

"Art Video Emulation"
a.k.a. Learning From the Birth of the Medium


 The Photoshop Era has come to a close in class. Or has it? (Depending on your approach to this assignment.) A new era begins which is the Video Era. A little less of the information highway for the time being. We begin in the 60s/70s. A time of revolt.


(Who can name any-all of the
artists who composed these 4 works?
PS : All mentioned in reading.)


Takashi Ito. Ghost [1984].


Bas Jan Ader. Nightfall [1971].


We have discussed the video art reading that was given to you. I would find it beneficial to look back through and check on the work of artists who you felt particularly connected to or want to look at more.

OVERALL ASSIGNMENT lies with this link : http://www.ubu.com/film/
(UBUweb . A proud supplier of a large archive containing experimental video art.)

Choose TWO video clips from this webpage and choose carefully. You will be shooting and editing your own version of the chosen clips preserving the soundtrack from the original source to be added to your video creation... OR, in the case of ambition, replacing with your own audio-soundtrack that is at the same instance creative and loyal to the source material.

(Disclaimer : As much as it pains me to say it, upon request of the establishment, Fatboy Slim's "Weapon of Choice" is out of bounds for this assignment.)

(Additional Disclaimer : Only by special request and my permission beforehand may an artist mentioned in the reading and one/two of their works that are NOT on Ubu be chosen.)

This is an interpretive experiment. Be creative in how you approach. There are less restrictions on parameters, but with great power comes great responsibility. You are expected to very much recreate points of view, camera angles, timing, subject matter and related items of your chosen videos. In lieu of that, also be creative to yourself and personal conceptual goals. Make it your own but a goal of the assignment is that the videos must be relatable to the original videos. There are many hundreds of choices on this site - take some time to explore these many varied historical and contemporary works and have fun! And yes, you are allowed to pick two of one artist. Though be wary. I'll expect more out of that, as I'll hope you have a flawless reasoning in doing so.

MINIMUM LENGTH OF VIDEO(S) : 30 SECONDS (each, not together). 
MAXIMUM LENGTH OF VIDEO(S) : 5 MINUTES (ditto; each, not together).
Understandably, there are very long videos on the site as well as features. You may choose to emulate a portion of those longer-than-thou videos.

In critiques we'll be viewing both original source videos and reenactments. Make sure there's a way you can link and/or embed the original clips through your blog!

Equipment and techniques. You may use anything from a cell phone video camera, laptop webcam, to a high end HD camcorder. Up to you most definitely. Sadie Benning used a kid's camera from Toys R' Us. Bill Viola uses enough frames per second to make your head spin.
 I recommend you use Final Cut Pro to edit your work, as it will be the primary epicenter that will be taught through (though Premier is a nice choice too). Also, you may wanna check out a DVD burning program (iDVD and/or DVD Studio Pro).

★ ★ ★ 

DUE OCTOBER 8th

1.) Your two videos chosen. You
will not be able to change beyond
this point, so pick wisely. Advisable
you begin work early anyway.

2.) Screen your selections for class
and explain in presentation why
you chose them. Are they representative
of you and personal themes-concepts?
Are you pursuing a visual technique?

DUE OCTOBER 15th

1.) A burned DVD containing, in playable
manner anyway you choose (menu select,
place both videos on one reel, etc.)
BOTH of your emulations to play!

2.) Your emulations and original sources
posted together on your blog in your
manner of choosing as well. You may
want to do this part the day before.

★ ★ ★ 
..

You may meet Dillon by time of this reading, or soon. Our new lab technician! He will be in charge of all weekday workshops from hereforth (and me on the occasional Sunday 'shop still). You can look to him for nearly any tech advice, but for this assignment, prod his brain for tips of video shooting, editing, and DVD burning). Next week's class may opt into a workshop day as well in preparing for the big turn-in.

★ ★ ★